
Getting started · Beginner · 2:18
Turn a floor plan into walls, doors and windows
Upload and scale a floor plan, trace its walls, choose their appearance and place doors and windows into the model.
Before you start: Use an account with floorplan uploads and a plan with a known measurement. Download the practice PNG to follow this example.
British male AI narration · English captions · Fictional demonstration project
Tutorial downloads
Download the supporting files and media for this lesson.
Follow along with the transcript
0:00Upload the practice floor plan
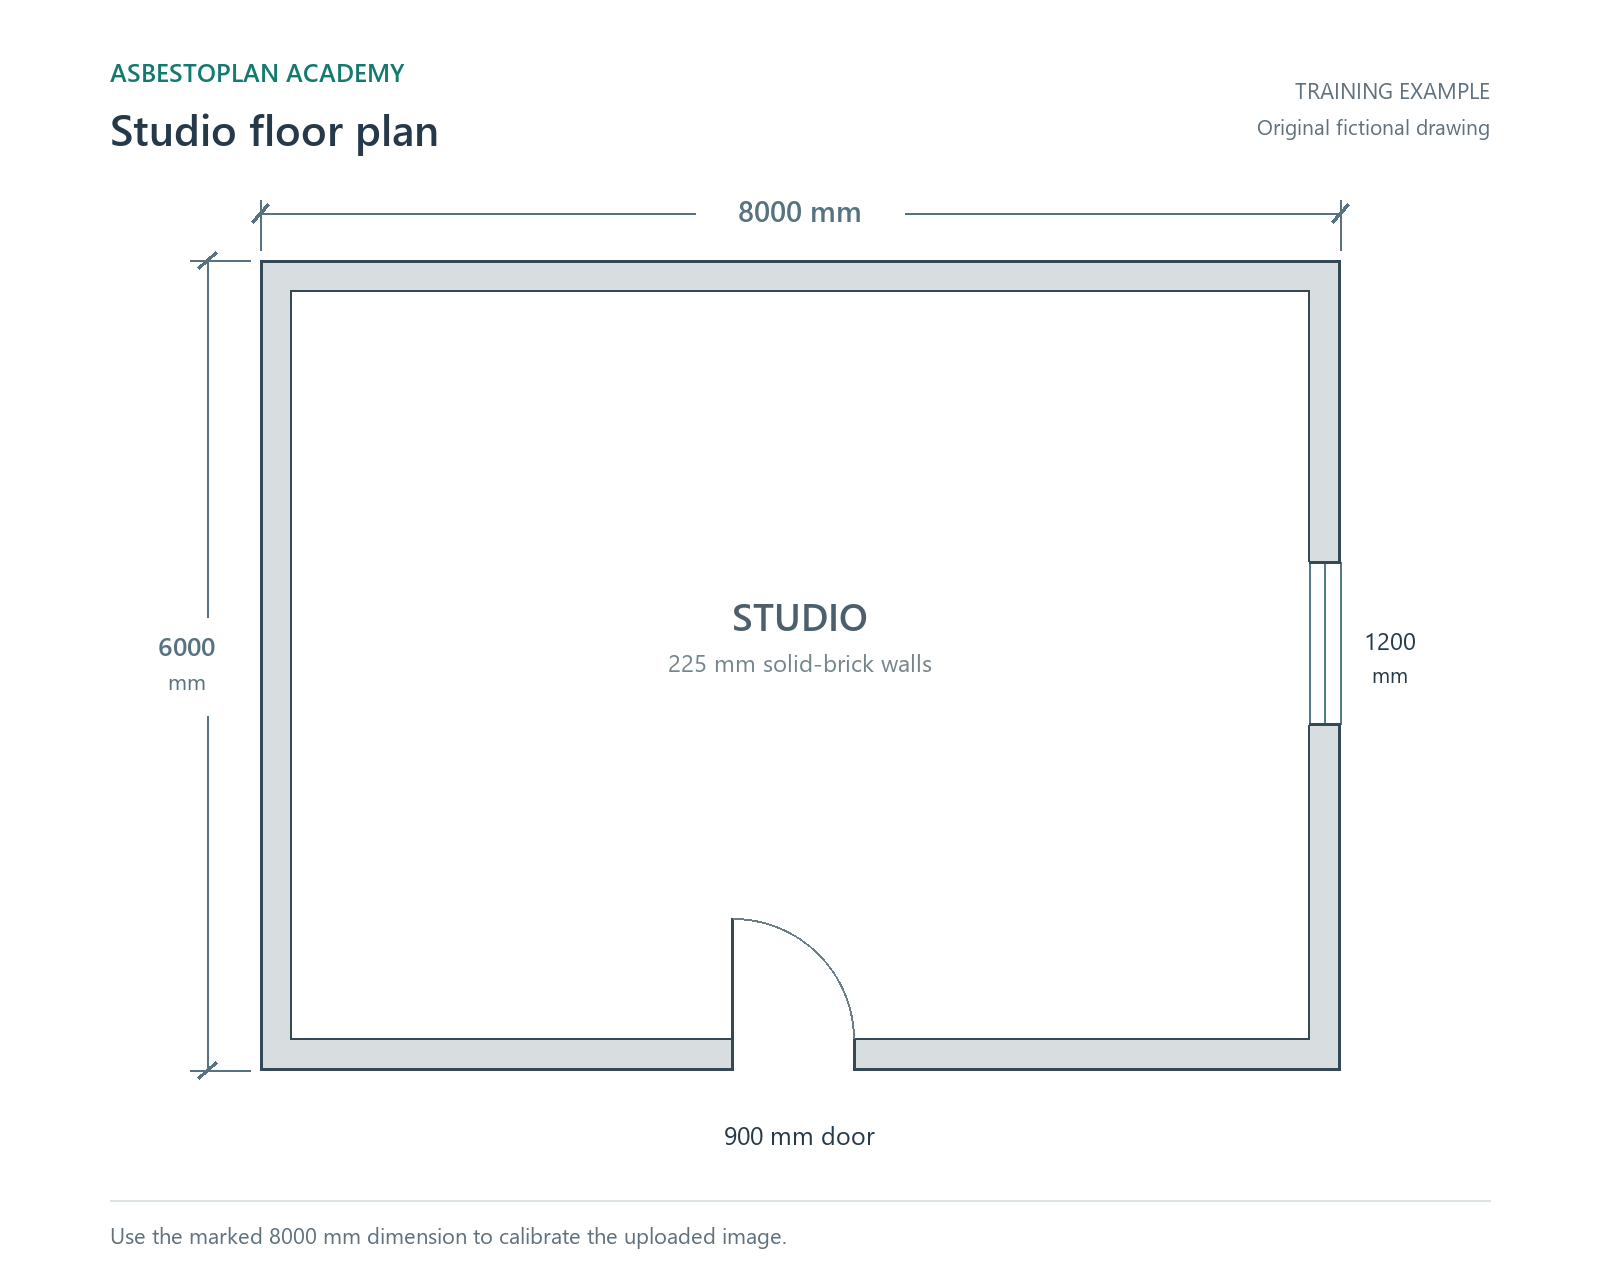
Already have a floor plan? On a paid plan, you can use it as a guide for your model. Open Floorplan and upload the image, then choose Fit plan to screen. Here, we are using the studio plan you can download below this video.
0:15Set the scale from a known measurement
Before tracing, set the scale. Choose Calibrate floorplan scale, then click the two ends of the marked measurement. Our example is eight thousand millimetres wide. Enter that real distance and apply it. Lock the image, and lower its opacity if that helps you see the new walls.
0:33Choose the wall construction
Open Structure and choose Wall. Select the construction that matches your drawing. This example uses solid brick, with a thickness of two hundred and twenty-five millimetres. The wall presets give you a starting point; use the thickness control when you need a different size.
0:51Trace the wall layout
Follow the centre of each wall on the image. Click the corners in order to trace the perimeter. Keep the wall continuous across the door and window positions; we will place those openings next. Click back on the first point to close the outline. Here, the editor turns the closed walls into a room and selects it.
1:11Choose the wall material look
With the room selected, open Walls and choose the boundary you want to change. In the wall build-up controls, choose Brick under Material look. This preset updates the wall appearance, construction and thickness. Use the settings that represent the wall in your drawing.
1:28Snap a door into the wall
Choose the single-door tool and click the entrance wall at the doorway position. The door aligns with its host wall. In Selected, check the opening width and height, and use the swing controls when needed. This example uses a nine hundred millimetre door.
1:44Place the window opening
Choose Window and click the side wall at the window position shown on the plan. In Selected, set its width, height and sill height. Here, the window is twelve hundred millimetres wide and high, with a nine hundred millimetre sill. It stays attached to its host wall.
2:02See the walls and openings in 3D
Switch to three D to see the traced model. For a cutaway, open View options and hide the roof on this storey. Use Side view to inspect the window opening, then return to two D to compare the model with the original plan.
Troubleshooting these tools
Was this helpful?
Your feedback helps us improve these instructions.